
If you are visiting Oahu, you have likely heard of the Diamond Head Hike. Many visitors wonder how difficult the hike really is and if they will be able to make it to the top. The trail to the summit of Diamond Head (Le’ahi) is a 0.8-mile one-way hike. Hikers gain roughly 560 feet in elevation over this short distance, and there are portions of the trail that are paved, stone, and stairs. In this post, I will detail how hard the diamond head hike actually is for someone who does not hike regularly!

Your Starting Point
The trail starts at the bottom of Diamond Head Crater. The parking lot is small, so many take the trolley to get to Diamond Head, or take a taxi. If you decide to take the bus, you will have a much longer walk to get to the start of the trail. Keep this in mind if you believe you may get worn out, or want to save your steps!
Tip: The bathroom at the start of the trail is the only bathroom that was available during our visit! I highly recommend using the bathroom before starting your ascent.
Part 1: The Pavement
The first part of the trail is a paved concrete walkway that starts ascending gradually. A wheelchair could be wheeled along this path. This portion quickly ends and becomes dirt and stone.

Part 2: Switchbacks
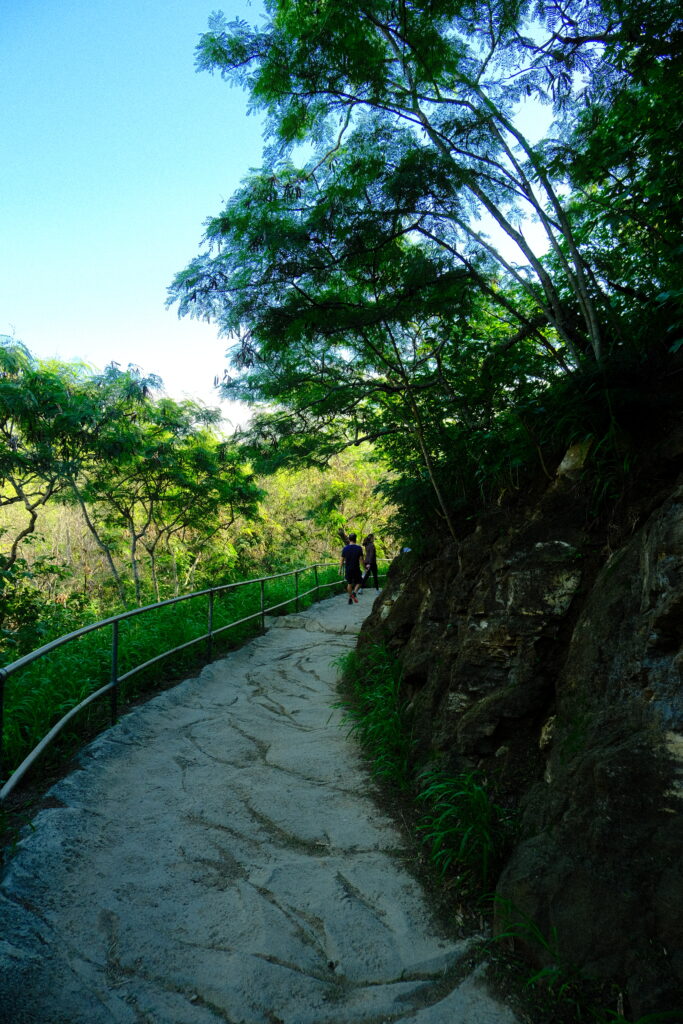
Now that you are on the stone and packed dirt path, you will start to gain elevation while walking through switch-back trails. At times, these switchbacks were narrow, and pools of water/mud had collected. While waiting our turn to cross a puddle, we saw one man go down and get covered in mud. If you are not agile, I would prepare yourself to possibly have to walk through some mud or water to reach the summit!
As you proceed upward, there are a few places to pull off to the side and catch your breath. Shade is relatively sparse, so keep this in mind if you are sensitive to the sun and heat!
If you are able to take your time, I believe that this portion of the trail is doable! We took a few breaks to catch our breath and cool down, taking pictures of the crater as we journeyed upwards.
Although the rocky floor was uneven, I would not say it was unmanageable. Those with mobility issues, or those who require canes, could do these portions if they can take their time. There are no rock scrambles or sections where you need to pull yourself up or jump from rock to rock.
Once you make it to the end of this section, you are rewarded with a lookout where you can step out onto a platform hanging over the crater.
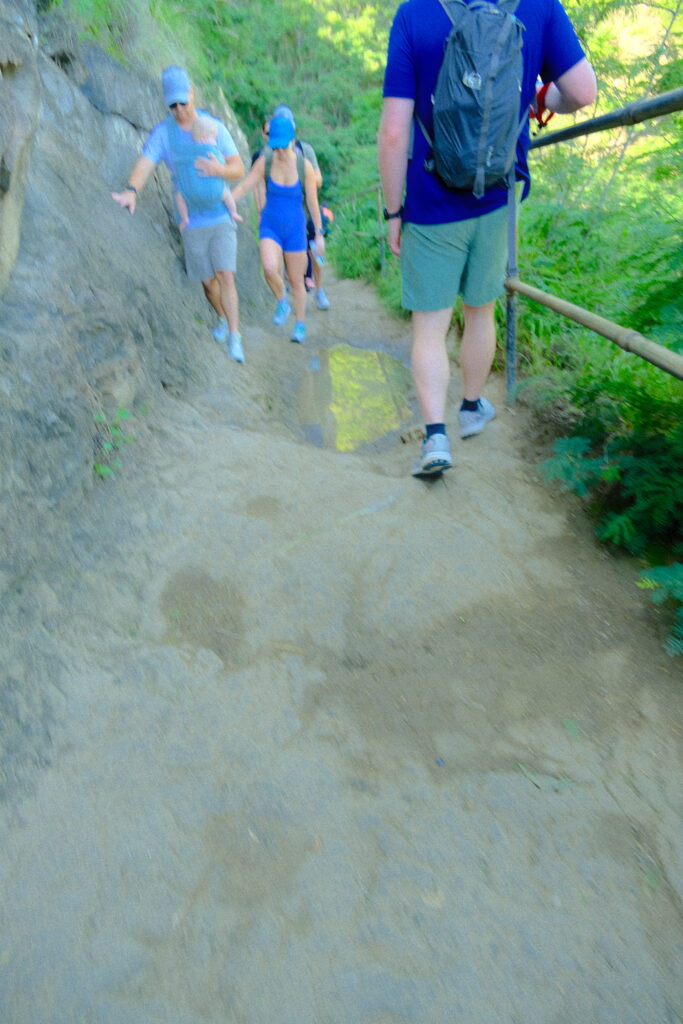
Part 3: The Stairs and Tunnel
In my opinion, this section of the trail is the hardest portion of the hike!
The stairs go upwards, and there is no place to step off and take a break. If you need to take your time and feel anxious when there are people behind you, I would suggest visiting on a weekday when the hike is not as busy!

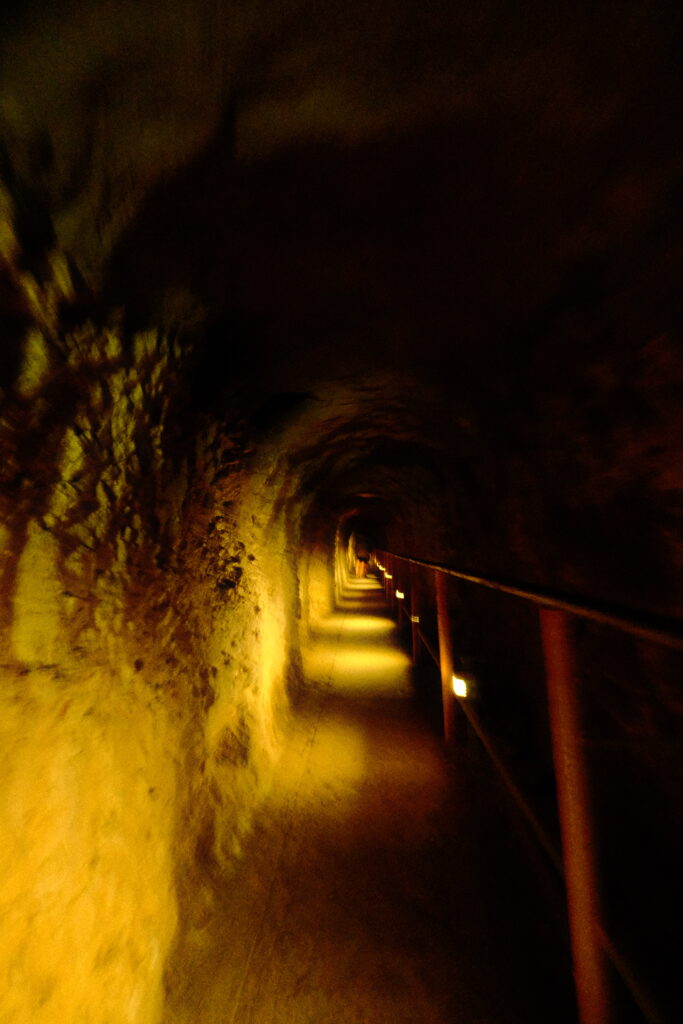
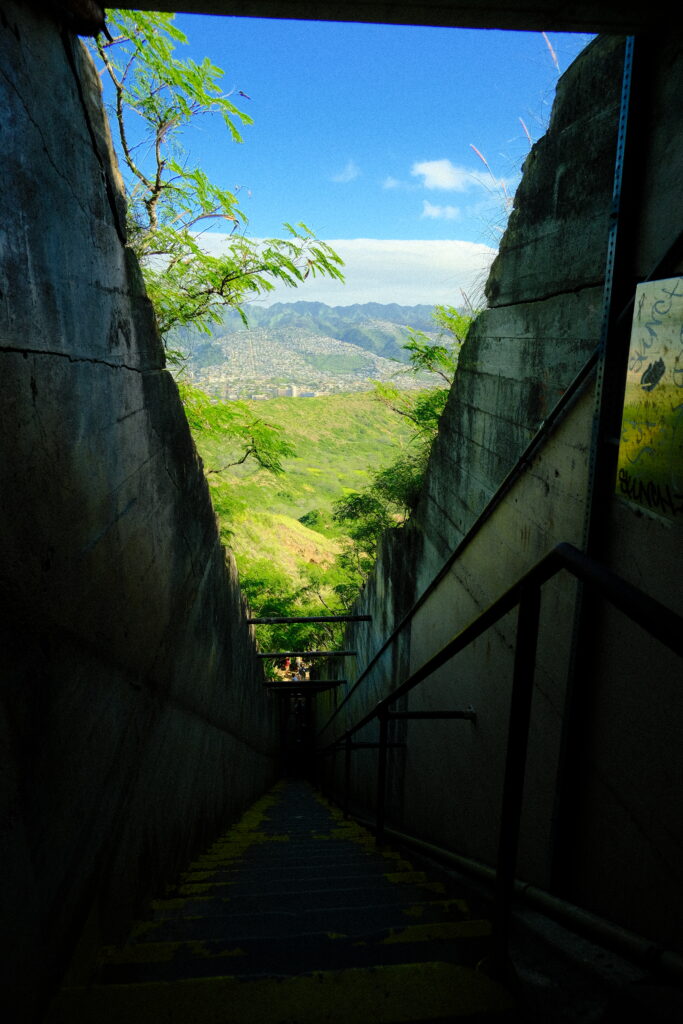
When you reach the top of the stairs, make sure you catch your breath as you continue through the 225-foot tunnel. Although the tunnel is lighted, it is very dark inside, low in some spots, and has enough width to accommodate two people standing side by side.
Part 3: The Last Push!
Decision time! After exiting the tunnel, you will be met with a sign that recommends you stay left. I highly recommend continuing left and ignoring the stairs to your right.
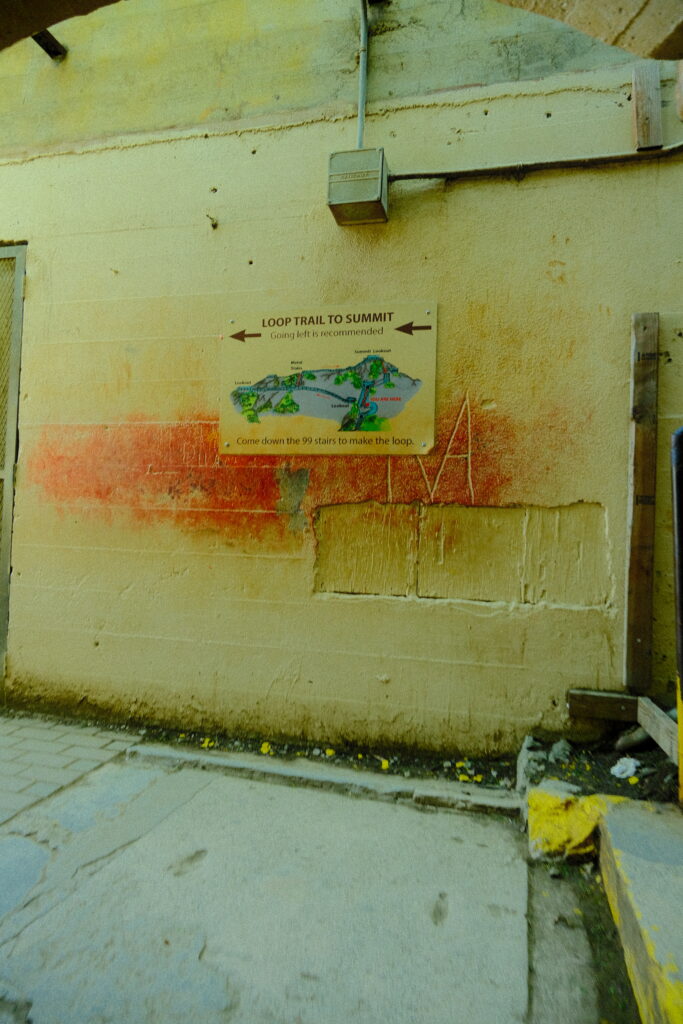
Going left, you are immediately given a beautiful lookout, with a few benches in partial shade! We caught our breath here, drank some water, and had a snack. The summit lookout is crowded, so if your heart is pumping, I recommend stopping here for a bit.
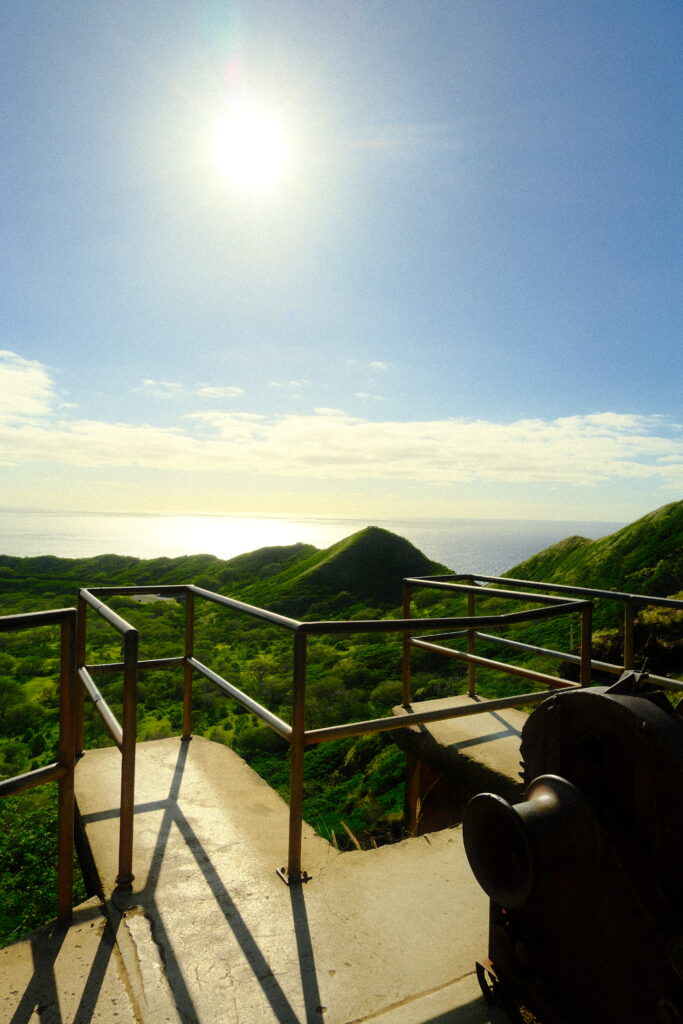
Journeying on, you continue upwards, gaining more elevation. Take a look at the lookout, then backtrack a bit to get back to the metal stairs that were on your right!

After these stairs, you continue with a view of the coast, along a stone pathway and a final set of stairs to the summit lookout! Well done!!

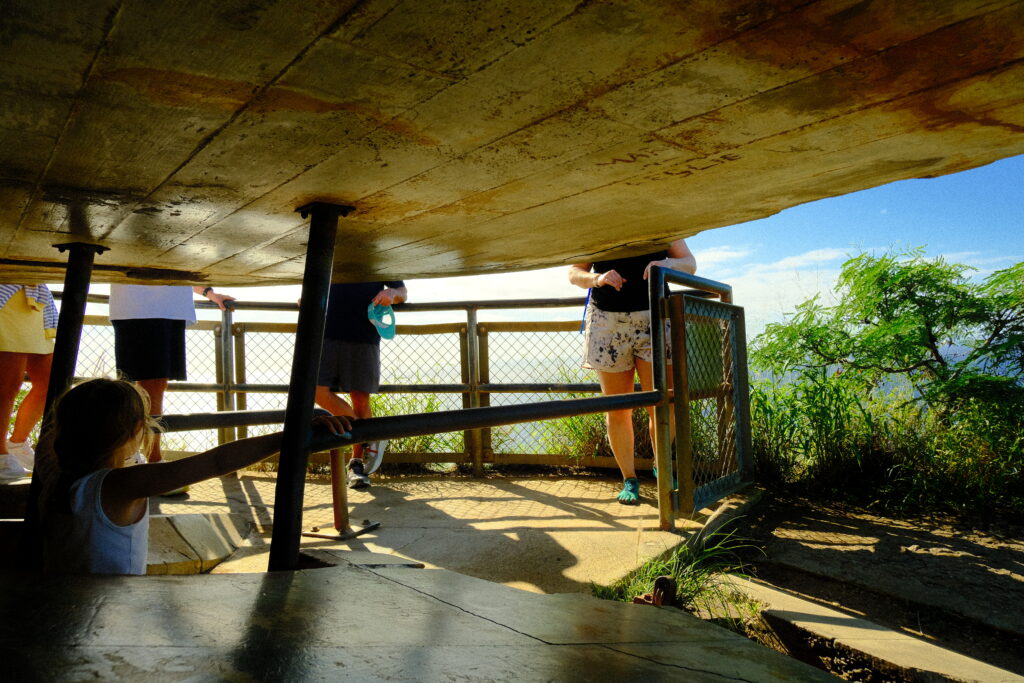
Part 4: The Summit
After you have finished up at the summit, make your way into the bunker! Getting down into the bunker does require a bit of agility and bending down.
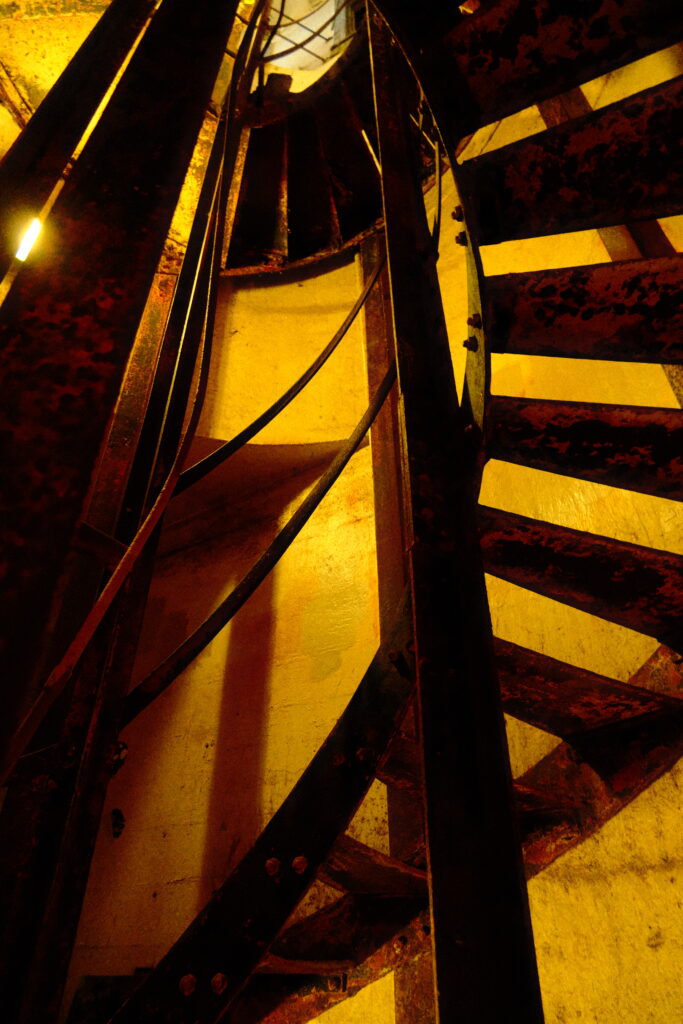
Once inside, there is a metal spiral staircase that you will take downwards. Stay to your right; some folks will be coming upwards, but those going downwards have the right of way.
At the bottom of this staircase, you will get to a set of concrete stairs. These are the same stairs you passed on the right earlier! At the bottom of these 99 stairs, you will be back at the tunnel and can retrace your steps down to the bottom of the crater!
Who can do this hike?
I believe that if you take your time, bring water, and are prepared for hiking in the heat, most people can do this hike. We saw people of all ages and athletic abilities at the summit.
If you are someone who is anxious about narrow pathways and holding people up, this might not be the hike for you! I would encourage you to have confidence, though. Anyone behind you can wait a few moments until there is room to pass. There is no award for getting to the summit in the least amount of time.

If you are someone who deals with knee pain when climbing stairs, I would also consider skipping this hike.
Go slow, and plan to spend around 2 hours hiking if you are not an active person, or want time to enjoy the view at the top.
Tip: The trail and crater both close at 6 pm daily. You should plan to start your hike by 4:30 pm at the latest to make sure you are not rushing to get back to the entrance!
Have you climbed Diamond Head? Let me know what you thought of this hike in the comments below!